How to Add Git Remote
You will notice word origin In an example of the syntax that you see below. Origin is not a flag nor does it have to be called “origin” in the first place. That is just the term to name your remote connection. You can name your remote connection however you want, but “origin” is a commonly agreed term when it comes to repository naming. Let’s see how we can add a Git remote repository. You’ll need two things. Name for your remote and URL of the remote repository. URL will be generated after you create a remote repository on GitHub. In order to add the remote repo, use the syntax below: Please take note that “origin” can be named to whatever you prefer and the URL that we used is just an example. You will have to add the URL of your own repository. Everyone who works in the IT industry wants to check if something that was done actually works. You’ll probably want to do the same after you add a Git remote repository. Luckily, this can be done quickly and efficiently. Just run the following: The output of that should look like the one below. This means that everything is good. Always run this just to be sure.
How to Add Remote with Tower Git Client
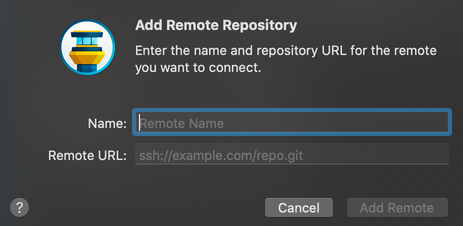
If your machine is running on Mac or Windows operating system, there is a high chance that you are using Tower Git. Since Tower Git has a GUI through which repositories are being manipulated there is a simple box in which you need to enter necessary info. An example of it can be found below. And basically, that’s all there is to it. Hopefully, you’ll find this article useful in your future interactions with Git.

