Step 1 – Install Fail2ban on CentOS 8
First of all, install epel-release package to configure EPEL yum repository on your CentOS 8 system. After that, install the Fail2ban rpm package using the following commands.
Step 2 – Configure Fail2ban
Fail2ban keeps configuration files under /etc/fail2ban directory. but we need to create a copy of this file as jail.local. Now we need to make necessary changes in jail.local file to create ban rules. Edit this file in your favorite editor and make changes in [DEFAULT] section.
Step 3 – Protect SSH/SFTP
After completing default configuration, go down in the same file jail.local and update [ssh-iptables] section as below.
Step 4 – Protect FTP
Let’s protect your FTP (vsFTPd) server, Find the below entry of [vsftpd-iptables] section and make changes as below. If you are not using vsFTPd, you can skip this section.
Step 5 – Restart Service and Test
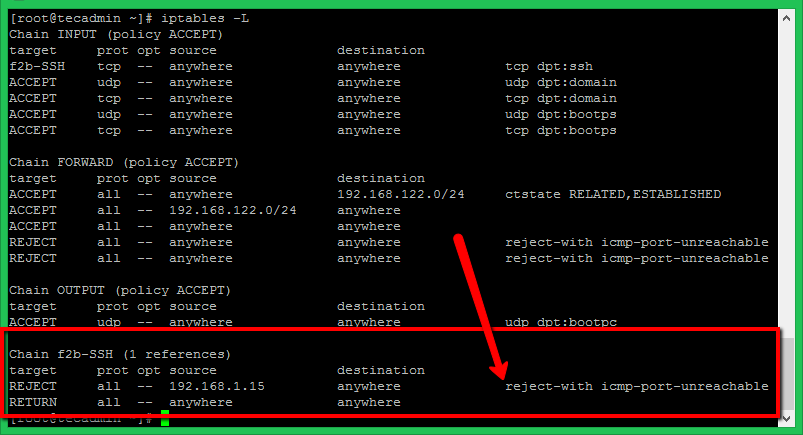
After making all the changes save your file and restart Fail2ban service using the following command. For testing purposes, I have tried SSH with the wrong credentials from a different machine. After three wrong attempts, Fail2ban blocked that IP via iptables with reject ICMP. You can see the rules in iptables after blocking the IP address as below. For SSH only systems, make sure to have SSH access from another IP before making these tests.
